If you’ve tried a few AI image models recently, you already know the truth: the hard part isn’t generating a good image—it’s getting a good image on purpose, then improving it without breaking everything.
That’s why comparing Seedream 5.0 Lite and Seedream 4.5 is worth your time. These two models share the same family roots, but they tend to feel different in everyday use—especially when you care about revision speed, consistency, and image-to-image workflows.
In this guide, we’ll keep things simple and practical:
- what each model is best at
- how to choose based on your workflow
- how to test both quickly
- and how to use DreamMachineAI tools to go from “nice draft” to “publishable result”
Why this comparison matters
Most people pick a model based on the first generation. In real production, the model you’ll love is the one that helps you through iteration:
- You generate a draft.
- You get feedback.
- You revise.
- You polish.
If a model forces you to restart every time you tweak one detail, it’s going to feel slow—even if its best-case image looks amazing.
So the real question isn’t “Which model is better?” It’s:
Which model gets me to a usable final image with fewer attempts?
Quick decision guide (60 seconds)
Choose Seedream 5.0 Lite when you care most about:
- following complex instructions in one pass
- making precise changes while keeping the rest stable
- working with prompts that include a lot of constraints (must/only/don’t)
- treating editing as a repeatable loop (draft → edit → polish)
Choose ByteDance Seedream 4.5 when you care most about:
- stable, cohesive compositions
- reliable style and character continuity
- predictable results for daily production
- reference-based workflows using Seedream image-to-image
And yes—many creators use both:
- explore and lock a direction
- refine with the model that has the smoother edit loop for the change you need
What’s new from Seedream 4.5 to Seedream 5.0 Lite
Seedream 4.5 in one paragraph
Seedream 4.5 is a strong “workhorse” model: it’s comfortable with longer prompts, tends to keep scenes cohesive, and is commonly used when you want consistent results without surprises.
In practice, it’s the model you reach for when you’re making:
- repeatable character portraits
- product images with stable framing
- poster-style compositions with consistent visual hierarchy
- a set of images that should look like they belong together
If you value stability, Seedream 4.5 often feels like the safer default.
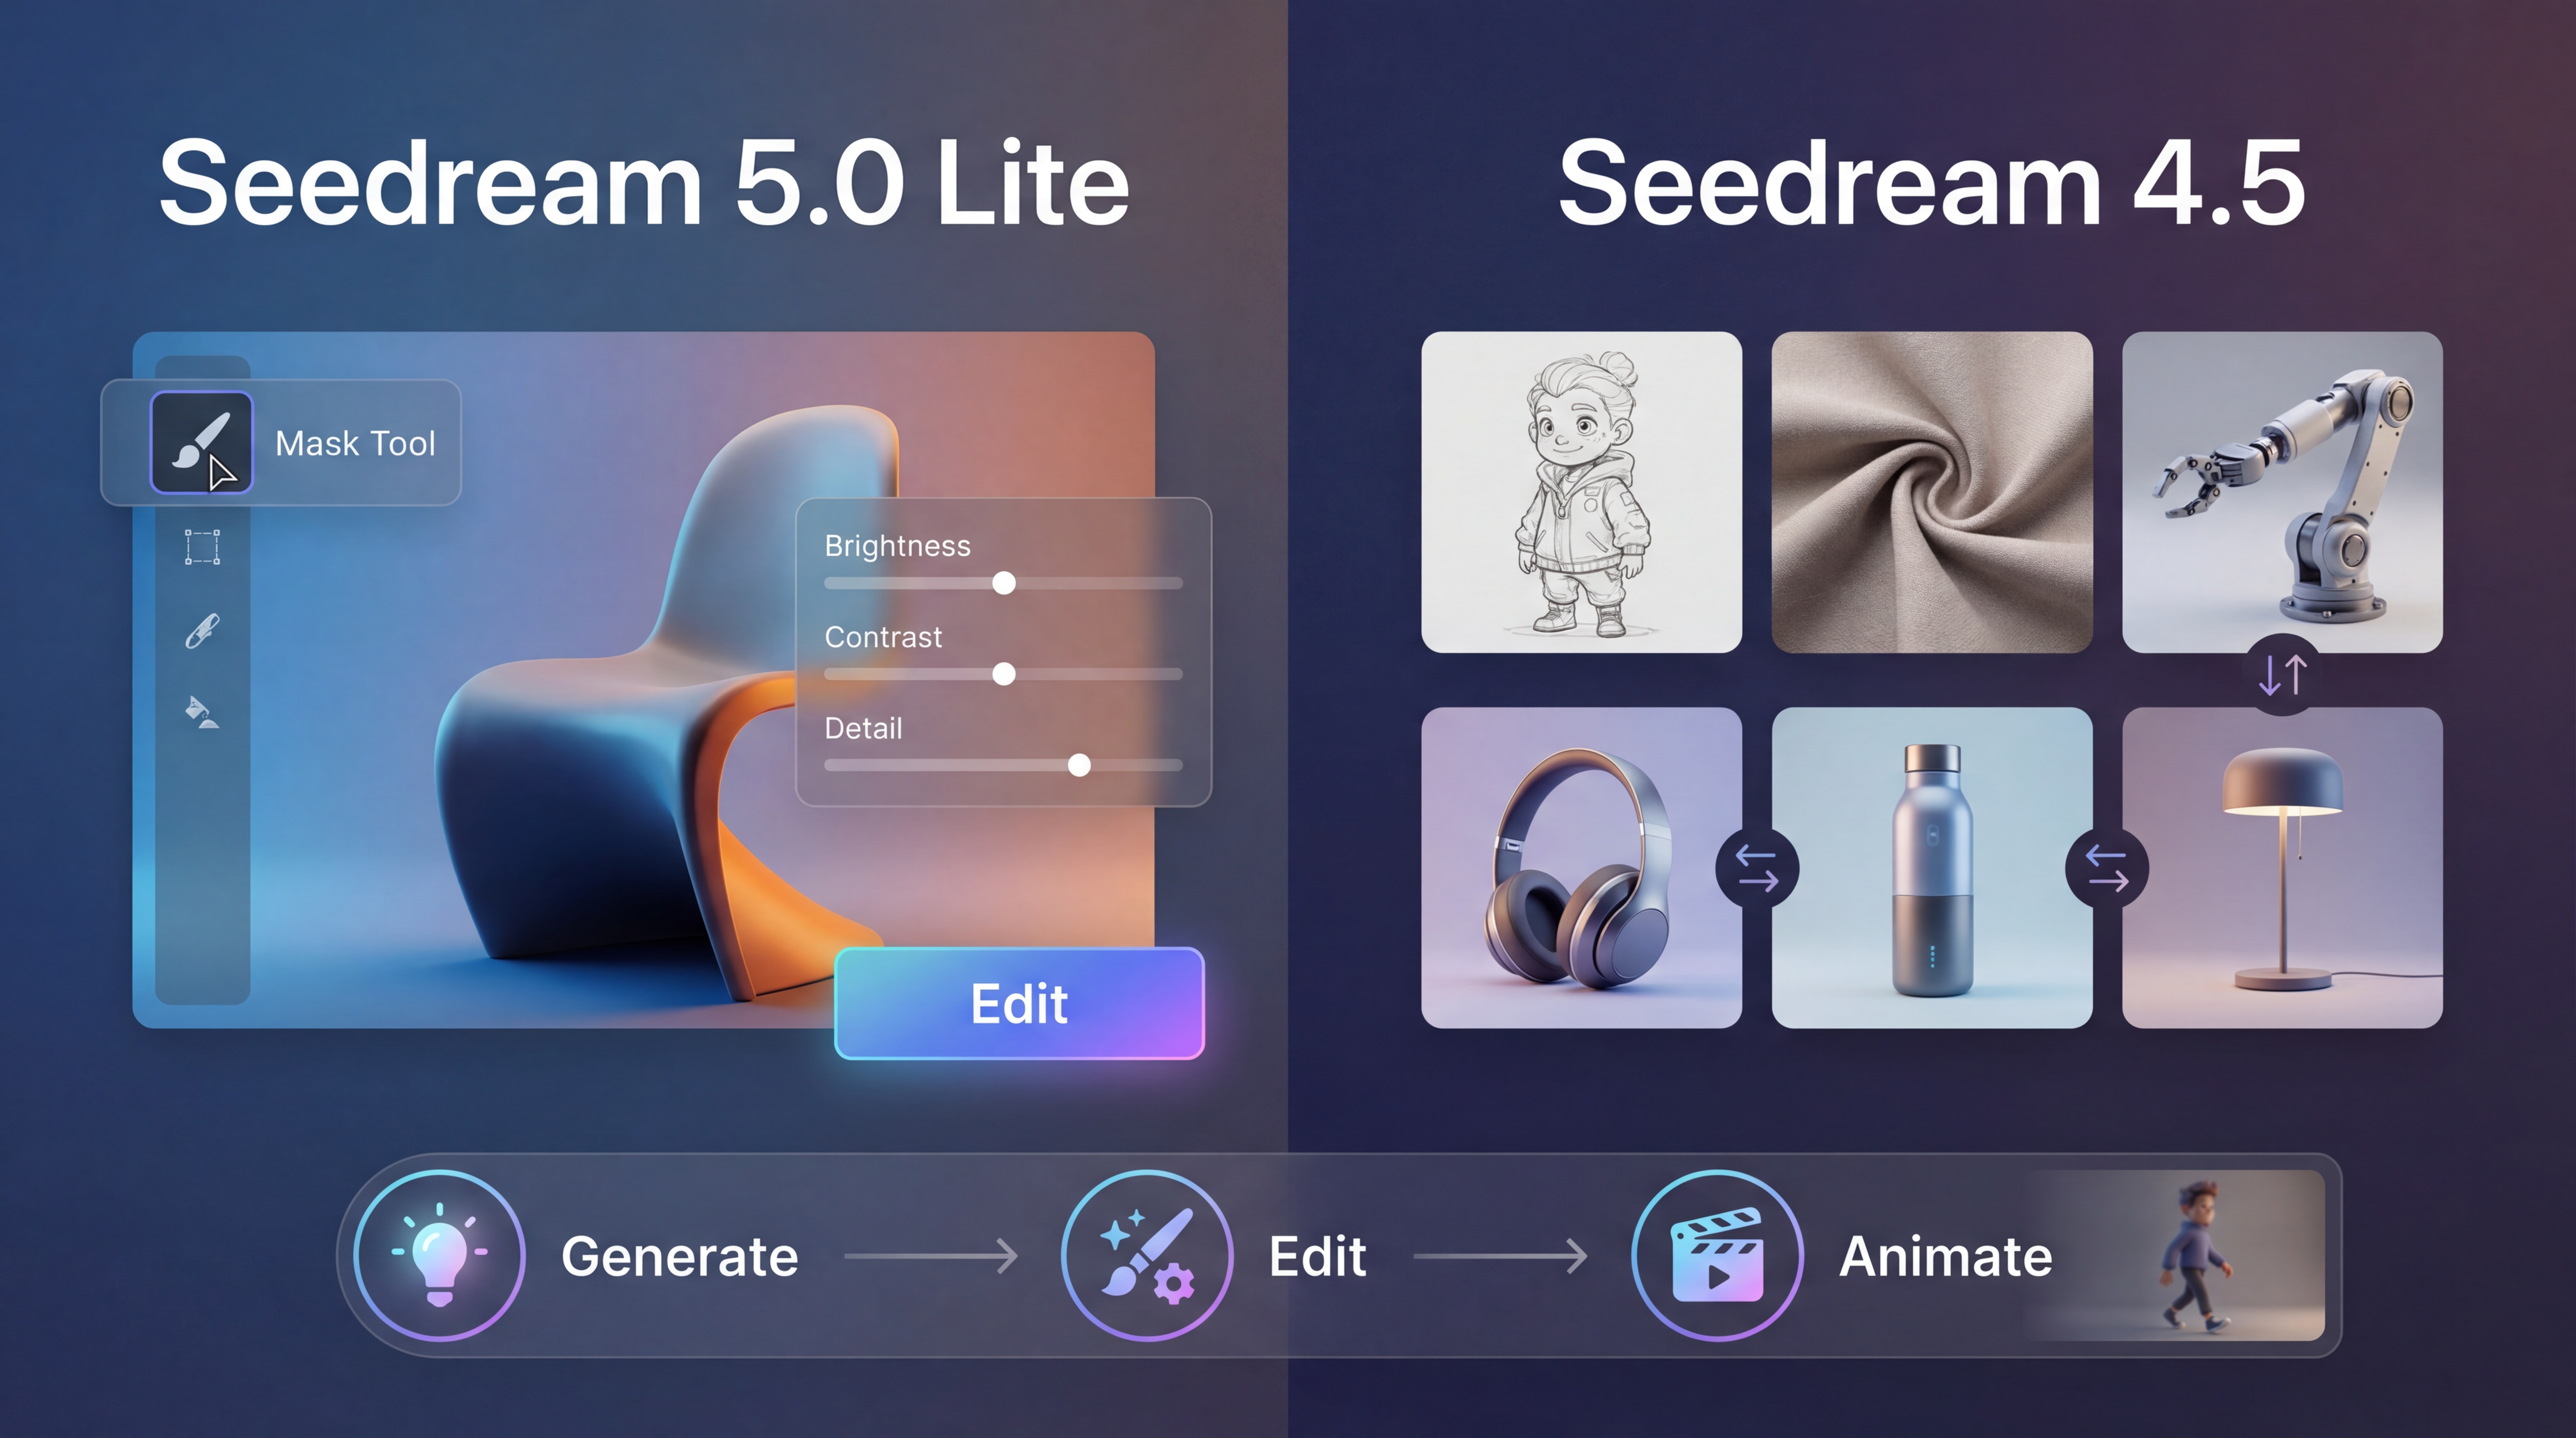
Seedream 5.0 Lite in one paragraph
Seedream 5.0 Lite is the “smarter constraint” option. It’s positioned around deeper intent understanding: instead of just responding to keywords, it’s designed to interpret layered instructions and execute them more consistently.
Where you tend to notice it:
- fewer missed constraints in complex prompts
- better compliance with “keep X unchanged, change only Y” edits
- smoother handling of multi-subject scenes where relationships matter
If Seedream 4.5 feels like “stable production,” Seedream 5.0 Lite often feels like “more capable reasoning.”
Generation quality: what you’ll notice first
Layout and structure
If you create posters, marketing visuals, UI-like graphics, or any structured image, you’ll care about layout.
- Seedream 4.5 often delivers stable compositions and clean hierarchy, which is great for predictable outputs.
- Seedream 5.0 Lite tends to shine when your prompt includes multiple rules that must be satisfied together—spacing, placement, subject relationships, “leave room for text,” and so on.
A quick heuristic:
- If you want something that “just works” reliably, start with Seedream 4.5.
- If you’re writing prompts that read like a design brief, try Seedream 5.0 Lite.
Text, typography, and dense details
For typography-heavy work, both models can be useful, but the way you prompt matters more than the model name.
A simple trick: include exact text in quotes and specify where you want it. Then add “no extra text” to prevent surprise labels.
If your goal is stable poster layouts or repeatable marketing graphics, Seedream 4.5’s steadiness can be a big advantage.
If your prompt includes complex constraints plus specific details that must remain accurate, Seedream 5.0 Lite can be the better fit.
Editing capabilities: where workflows diverge
This is the section that actually affects your productivity.
Seedream 5.0 image editing (precision revisions)
A good editing model makes you feel like you’re working with layers.
That’s the best mental model for Seedream 5.0 image editing:
- keep the subject and composition the same
- change one targeted detail
- preserve everything else
It’s especially useful for edits like:
- “Change only the lighting to studio softbox.”
- “Replace the object in the hand with a coffee cup.”
- “Keep the pose, change the background to a minimal studio gradient.”
If you hate rerolling images just to fix one detail, this kind of editing responsiveness matters a lot.
Seedream image-to-image (reference fidelity and consistency)
On the other hand, sometimes you don’t want “smart reasoning”—you want faithful consistency.
That’s where Seedream image-to-image workflows (common with Seedream 4.5) are extremely practical.
Use image-to-image when you want:
- a consistent character across outfits
- a product kept in the same framing while changing backgrounds
- style transfer that keeps the subject recognizable
- a cohesive set of images that match each other
If you’re building a series, Seedream 4.5’s image-to-image approach can save a lot of time.
A repeatable “10-minute side-by-side test”
If you want to choose without hype, run this simple test.
Step 1: Use one prompt you actually need
Pick a prompt you would genuinely publish:
- a product hero image
- a social promo poster
- a character portrait you’ll reuse
Step 2: Generate once in both models
Keep the prompt the same. Don’t rewrite it for each model.
Step 3: Perform one edit in each style
- In Seedream 5.0 Lite: do a constraint-heavy edit (change only X, preserve Y and Z).
- In Seedream 4.5: do a reference-based image-to-image revision.
Step 4: Score the result like a production person
Ask:
- How many tries did it take to get “usable”?
- Did it follow layout rules?
- Did edits keep the rest stable?
- Did the result feel consistent across variations?
The winner isn’t the prettiest image. The winner is the model that gets you to “final” with less friction.
Copy/paste prompt templates (designed to work for both)
These templates are intentionally brief and structured. They’re meant to be edited and reused.
Template A: Poster layout with whitespace rules
Create a vertical promotional poster for [TOPIC]. Leave the top third empty for a headline. Center one hero visual. Bottom area reserved for a CTA. Modern minimal design, high readability. No extra text.
Template B: Product hero shot
A premium e-commerce hero image of a single [PRODUCT] centered. Clean background with subtle gradient, studio softbox lighting, crisp edges, soft shadow. Minimal composition. No watermark, no hands, no extra text.
Template C: Edit-only instruction block
Keep subject identity, pose, and composition unchanged. Change only the background to [BACKGROUND] and the lighting to [LIGHTING]. Do not add text.
Template D: Style transfer with identity lock
Apply the style of [REFERENCE STYLE] (palette + texture + mood) while keeping the subject identity and composition consistent. Maintain clean edges and readable shapes.
Recommendation: Try it on DreamMachineAI (and use the right tool for the job)
If your goal is to work efficiently, the fastest workflow is usually:
- generate a couple solid directions
- pick the best base
- refine and export
DreamMachineAI makes that easier because you can move from model testing into production tools without rebuilding your workflow.
Start with AI Image Generator for quick A/B testing
Use the AI Image Generator to quickly compare outputs and settings (aspect ratio, resolution, prompt variations) before you commit to one model.
- AI Image Generator: https://dreammachineai.online/ai-image-generator/
Use Flux AI Image Generator for extra style baselines
If you want alternative looks fast, the Flux AI Image Generator can be a helpful baseline for style exploration.
- Flux AI Image Generator: https://dreammachineai.online/flux-ai-image-generator/
Add music and motion when your image is finished
If you’re producing content for short-form video or ads, DreamMachineAI’s extra tools make your workflow smoother:
- AI Music Generator (background tracks for reels/shorts): https://dreammachineai.online/ai-music/
- Image to Video (animate a still into motion): https://dreammachineai.online/image-to-video/
- Photo to Video (turn photos into clips): https://dreammachineai.online/video-generator/
- AI Hugging (quick effect-style template content): https://dreammachineai.online/ai-hug-video/
A simple end-of-article CTA that feels natural:
Start with Seedream 4.5 for stable generation and image-to-image consistency, then try Seedream 5.0 Lite when you need smarter constraint handling and precision edits.
FAQ
Is Seedream 5.0 Lite always better than Seedream 4.5?
Not always. Seedream 5.0 Lite is often better for complex constraints and precise edits. Seedream 4.5 can feel more stable for repeatable daily production.
Which is best for consistent characters and product shots?
If you rely on references and want cohesive sets, Seedream image-to-image workflows with Seedream 4.5 are very practical.
Which is best for precise local edits?
If your edits are “change one thing and keep everything else,” Seedream 5.0 Lite tends to be the better fit.
Final takeaway
The simplest way to think about this comparison:
- Seedream 4.5 is the stable, consistent option—especially if you do series work and rely on Seedream image-to-image.
- Seedream 5.0 Lite is the smarter constraint-and-edit option—especially if you do complex prompts and precision revisions.
And if you’re doing real content production, you don’t have to pick just one. The best workflow is the one that gets you from “draft” to “final” quickly—and DreamMachineAI’s tools make that whole pipeline easier to run.